After reading books, watching many tutorials and just playing around on ZBrush I have just very briefly set myself a target to construct a basic human mesh out of ZSpheres. This way when it comes to Ba8 I will know what I am doing and how to construct a basic mesh for my character that I choose to design. Plus it will give me a chance to learn more about the form and a routine of digital sculpting.
For this run through I looked at Human Anatomy Digital Sculpting tutorial by Scott Spencer.
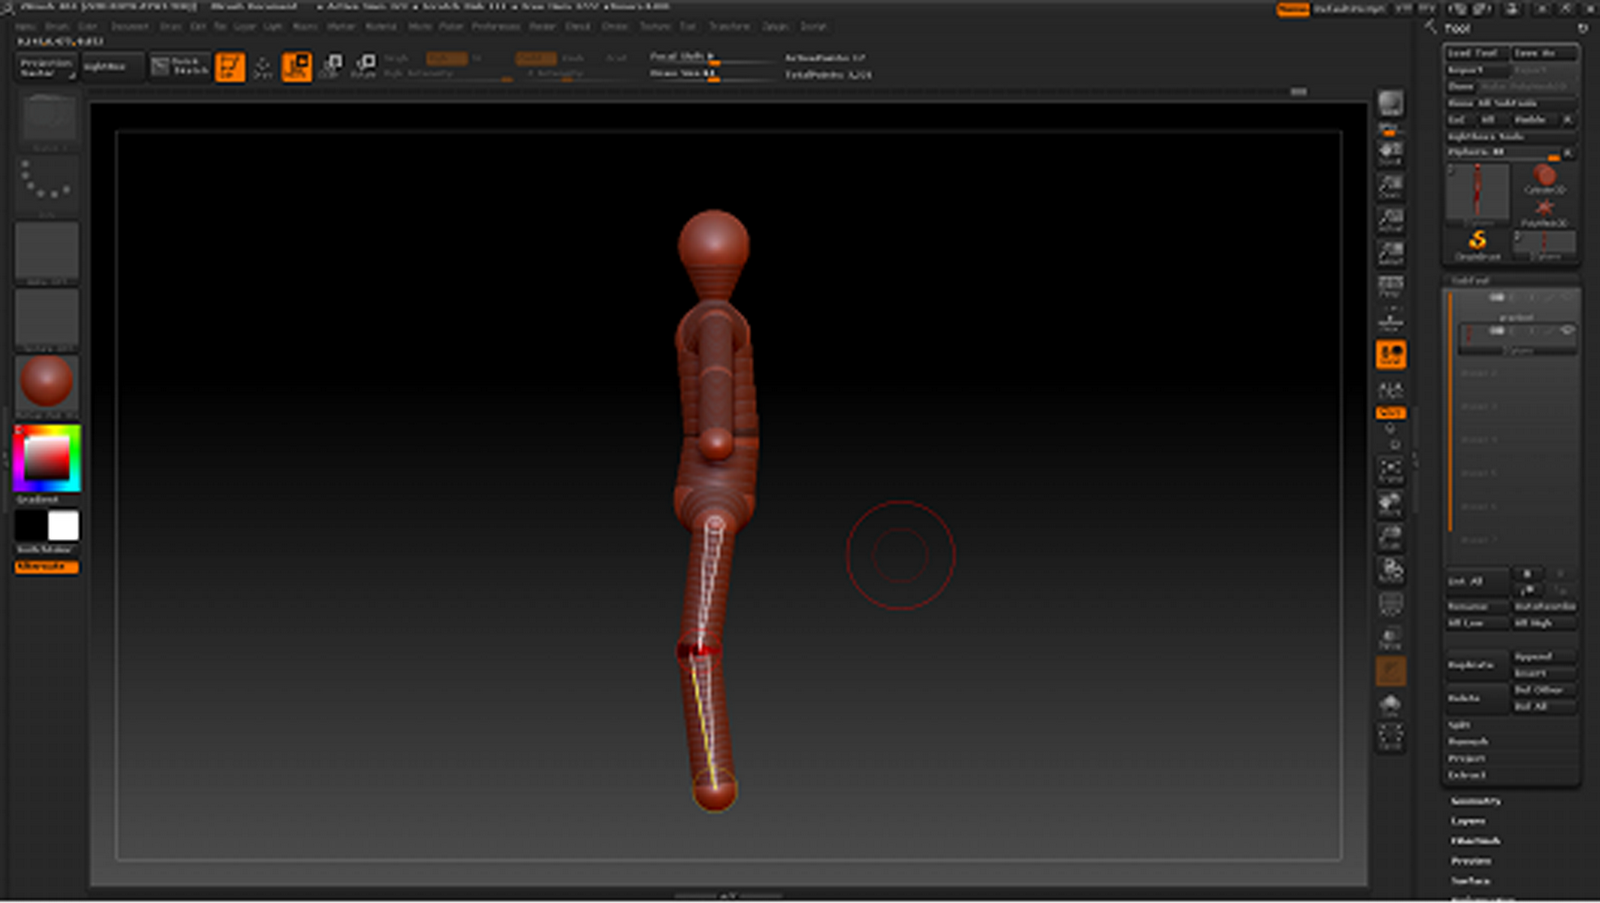
For the first stage I used a session of planes on top one another creating a guideline grid of I needed, so for this instance 8 planes equally spread to show the size and positioning of how the character will be laid out, the smaller line is for the shoulders.
After the planes are dragged on the canvas I appended a simple ZBrush Zsphere, these are used to construct the mesh that I will make. The sphere is then scaled down to the size of gaps in between the planes and placed touching of the third plane and forth.
Once it is in place I than created another 2 Zspheres by clicking on the existing one and dragging them either down or up to create the centre of the mesh, this would be the torso of my mesh. The torso is then correctly lined up to the smaller line representing the shoulders.
After the Torso is correctly lined up to the planes I then add another set of Zspheres, 2 for the shoulders and wrists and 2 for the hips and ankle. When these are added I then dragged the limbs out.
After I added the limbs to the torso I realised that the mesh hadn't lined up correctly so I removed the hips back to the correct plane line. Then I pulled down the arms towards the hips this way I knew that they were the correct length.
Once that was completed I drew another 2 Zshperes for the head and neck, I then pulled the head sphere out and scaled it up to represent a head shape.
After the sculpt looks correct I double check using the zshpere skin, this moulds the mesh together and gives you a simple and easy representation of the mesh.
Once I am happy with the form of my mesh I begin moving the mesh into a simple gesture to make the pose more dynamic, to do this I add a zsphere in arm for the elbow and leg to create a knee.
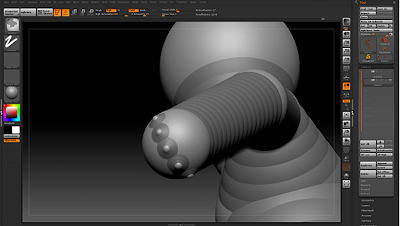
Afterwards I change the material to a simple looking grey scale, and then begin place the fingers on the hand. I first place zspheres on the hand and then I do it again but this time I pull them out to create fingers.
Then by adding another Zshpere to the thumb you can give it a knuckle. I then begin to check the mesh by looking at the poly structure and frame. Once everything looks okay I start to scale down the tips of the fingers to make them more finger like.
Final Step with the fingers was to add 2 sets of knuckles, this way the fingers could be rotated and moved to look bent and given form. It also gives the mesh some form of life even when it is still mesh.
After I was satisfied with the hands and fingers I began adding to Zspheres to the ball of the ankle to create the front part of the foot and heel.
I then pulled out the front part of the foot, scaled down the heel and moved it facing down to make it look more like a heel and then I placed Zspheres on the front part to create toes.
After I have placed the spheres correctly I pull them out to create toes, I also start to angle the little toes making the foot more dynamic and foot like. Afterwards I check to make sure that the mesh looks like a human form and that it hasn't changed from the guidelines too much.
I moved the chest up and the hips to give the
mesh a better looking posture, I also moved the head forward slightly, again to create a better posture for the mesh.
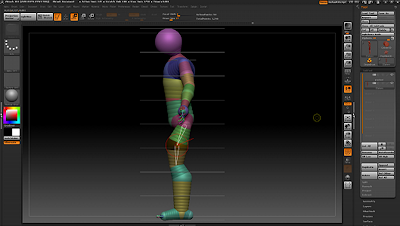
Once I am happy with that position I then added another Zsphere in the chest to make it more present in the mesh and I scaled it to a reasonable size moving the chest further up the mesh
Afterwards I moved the shoulders up as the chest was pushing too close to the shoulders, this also created more of a shoulder width in comparison to the size of the head.
Once that was taken care of more zshperes where added in the arms for the biceps and the forearm, again this is to create more of a natural curved gesture rather than a robotic stance. I proceeded this also with the legs creating a calf and knee bone.
Adding knuckles to the feet to make the feet have contact with the floor, making it more of a realistic mesh and again giving the mesh gesture and form.
Twisting the toes inwards like a real foot.
Making sure the form is in tact and looking accurate. This would be an acceptable bash mesh to begin sculpting from.
Begin using the move tool to pull the sides of the sculpt to get more of a human figure form, also pull the legs around to place them in a better form.
First begin with using the clay tubes brush to create an oval like shape to represent the chest and working to show only the big muscles, not looking to define sculpt just yet.
Fiddling with the material as I didn't find the red matte material comfortable to work with. I began moving the head around and started working into the whole mesh, I tried to not focus on one single point as I didn't want to fuss over a particular area.
Working the clay tubes in the back, again oval like shapes for the shoulder blades and for the buttocks.
Started defining the quads and placing a knee cap for reference. And also starting the calves.
After playing around I now feel that I have learnt so much about how to start a mesh and sculpt, I shouldn't have too much trouble, even though my goal to get to this stage, I did have some issues but I found getting used to the program is all it takes.